Tutorial 7: Bumpy Texture
In this tutorial you'll create a highly textured surface using a Star shape with many points. By alternating between an outer and inner radius on every point, the star creates vertical ribs that look like knurling or corrugation — no complex math required.
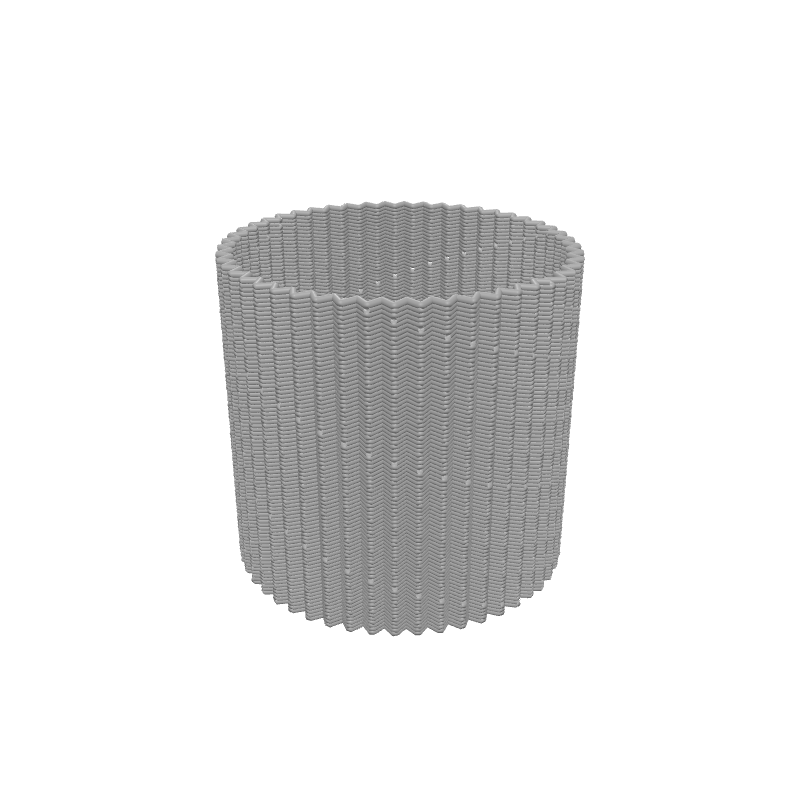
What you'll learn
- How to use the Star block for surface textures
- How point count and radius difference affect rib density and depth
- How to parameterise texture properties with Set Variable and viewport sliders
Prerequisites
- Completion of Tutorial 2 is recommended.
Step 1: Define your variables
We'll expose the star parameters as viewport sliders so you can fine-tune the texture interactively.
Set Variable
Interactive preview is available in the interactive reader.
Step 1
Create four variables
Add four Set Variable blocks to the top of your Path Group:
- outerRadius =
26
Enable Show in viewport on each one.
Step 2: Centre on the build plate
Translate
Interactive preview is available in the interactive reader.
Step 2
Add a Translate block
Drag a Translate block below the Set Variable blocks.
Set X to Bed Size X / 2 and Y to Bed Size Y / 2.
All remaining blocks go inside the Translate body.
Step 3: Add the Spiral Up block
Spiral Up
Interactive preview is available in the interactive reader.
Step 3
Add Spiral Up
From the Z Strategy category, drag a Spiral Up block into the Translate body.
Set Start Z to Layer Height (the printer-setting block), End Z to the variable height, and Rotations to height / layer_height.
Using the Layer Height block instead of a magic number means the spiral resolution automatically matches your slicer settings.
Step 4: Add the Star shape
Instead of a Circle, we use a Star. A star with many points creates a shape that oscillates rapidly between the outer and inner radii, producing vertical ribs when spiralled upward.
Star
Interactive preview is available in the interactive reader.
Step 4
Add a Star
Drag a Star block into the Spiral Up body.
Set Points to the variable bumpPoints, Outer Radius to the variable outerRadius, and Inner Radius to the variable innerRadius.
Because the spiral traces a continuous helix, the star points align vertically from layer to layer, creating consistent vertical ribs across the entire surface.
Complete block program
Full program — Tutorial 7
Interactive preview is available in the interactive reader.
Final block structure
| # | Block | Where | Values |
|---|---|---|---|
| 1 | Set Variable outerRadius | Path Group | 26 · Show in viewport |
| 2 | Set Variable innerRadius | Path Group | 24 · Show in viewport |
| 3 | Set Variable bumpPoints | Path Group | 50 · Show in viewport |
| 4 | Set Variable height | Path Group | 50 · Show in viewport |
| 5 | Translate | Path Group | X = Bed Size X / 2, Y = Bed Size Y / 2 |
| 6 | ↳ Spiral Up | Inside Translate | Start Z = Layer Height, End Z = height, Rot = height / layer_height |
| 7 | ↳ Star | Inside Spiral | Points = bumpPoints, OR = outerRadius, IR = innerRadius |
Outcome
You have created a fully parametric textured cylinder! The surface features vertical ribs that provide better grip and hide layer lines. Drag the sliders to reshape the texture instantly.
Load this tutorial
Interactive preview is available in the interactive reader.
Interactive preview is available in the interactive reader.
What's Next
Tutorial 8: Expanding Spiral — Create a flat 2D spiral that grows outward from the centre.