Tutorial 2: Spiral Vase with Dynamic Radius
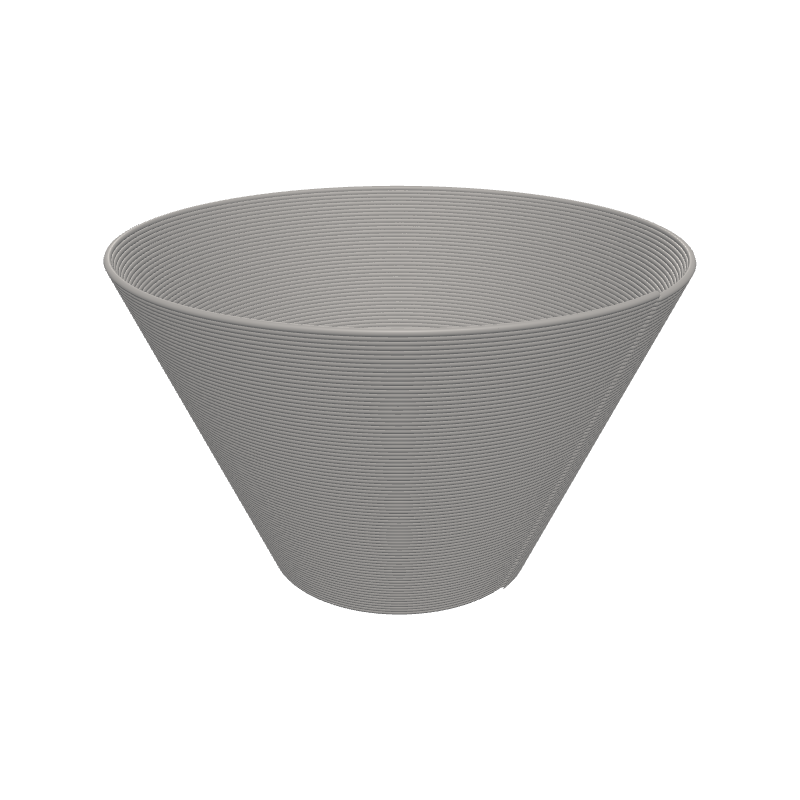
In this tutorial you'll create a smooth, continuous spiral vase that flares outward as it rises. You'll use Set Variable blocks to make every dimension tweakable, the Translate block to centre the print on any bed, and Map Range to smoothly blend the radius from bottom to top.
What you'll learn
- How to define parametric dimensions with Set Variable and viewport sliders
- How to centre geometry with Translate and Bed Size blocks
- How to create continuous spiral toolpaths with Spiral Up
- How to drive the radius with Map Range and normZ
Prerequisites
- Completion of Tutorial 1 is recommended but not required.
- Start a new empty project in SynthBlocks.
Step 1: Define your variables
Every dimension in this vase will live in a Set Variable block with Show in viewport enabled. This turns each value into an interactive slider you can drag in the 3D view.
Set Variable
Interactive preview is available in the interactive reader.
Step 1
Create three variables
Add three Set Variable blocks to the top of your Path Group, in this order:
- vaseHeight =
50
Enable Show in viewport on each one.
Step 2: Centre on the build plate
Instead of hard-coding bed coordinates, we use the Translate block with the printer-setting blocks Bed Size X and Bed Size Y. This keeps the print centred on any printer.
Translate
Interactive preview is available in the interactive reader.
Step 2
Add a Translate block
Drag a Translate block below the Set Variable blocks.
Set X to Bed Size X / 2 and Y to Bed Size Y / 2.
All remaining blocks go inside the Translate body.
Step 3: Add the Spiral Up block
The Spiral Up block moves the nozzle upward in a continuous helix while repeating a 2D shape — perfect for vase-mode prints.
Spiral Up
Interactive preview is available in the interactive reader.
Step 3
Add Spiral Up
From the Z Strategy category, drag a Spiral Up block into the Translate body.
Set Start Z to Layer Height (the printer-setting block), End Z to the variable vaseHeight, and Rotations to vaseHeight / layer_height.
Using the Layer Height block instead of a magic number means the spiral resolution automatically matches your slicer settings.
Step 4: Draw a Circle with a dynamic radius
Inside each rotation the printer draws one circle. We want the radius to grow from bottomRadius at the base to topRadius at the rim. Spiral Up exposes a normZ variable that goes from 0 at the bottom to 1 at the top — feed it into Map Range.
Map Range
Interactive preview is available in the interactive reader.
Step 4
Add a Circle with Map Range
- Drag a Circle block into the Spiral Up body. Leave CX and CY at
0.
Complete block program
Full program — Tutorial 2
Interactive preview is available in the interactive reader.
Final block structure
| # | Block | Where | Values |
|---|---|---|---|
| 1 | Set Variable vaseHeight | Path Group | 50 · Show in viewport |
| 2 | Set Variable bottomRadius | Path Group | 20 · Show in viewport |
| 3 | Set Variable topRadius | Path Group | 40 · Show in viewport |
| 4 | Translate | Path Group | X = Bed Size X / 2, Y = Bed Size Y / 2 |
| 5 | ↳ Spiral Up | Inside Translate | Start Z = Layer Height, End Z = vaseHeight, Rot = vaseHeight / layer_height |
| 6 | ↳ Circle | Inside Spiral | CX = 0, CY = 0 |
| 7 | ↳ Map Range | Radius | In 0–1, Out bottomRadius–topRadius |
| 8 | ↳ Variable | Map Input | normZ |
Outcome
You have created a fully parametric spiral vase! The printer traces a continuous helix from the bed up, starting at a 20 mm radius and smoothly expanding to 40 mm at the top.
Load this tutorial
Interactive preview is available in the interactive reader.
Interactive preview is available in the interactive reader.
What's Next
Tutorial 3: Basic Cube — Learn how to create solid objects layer-by-layer with Stack Layers.