Tutorial 11: Grid Pattern
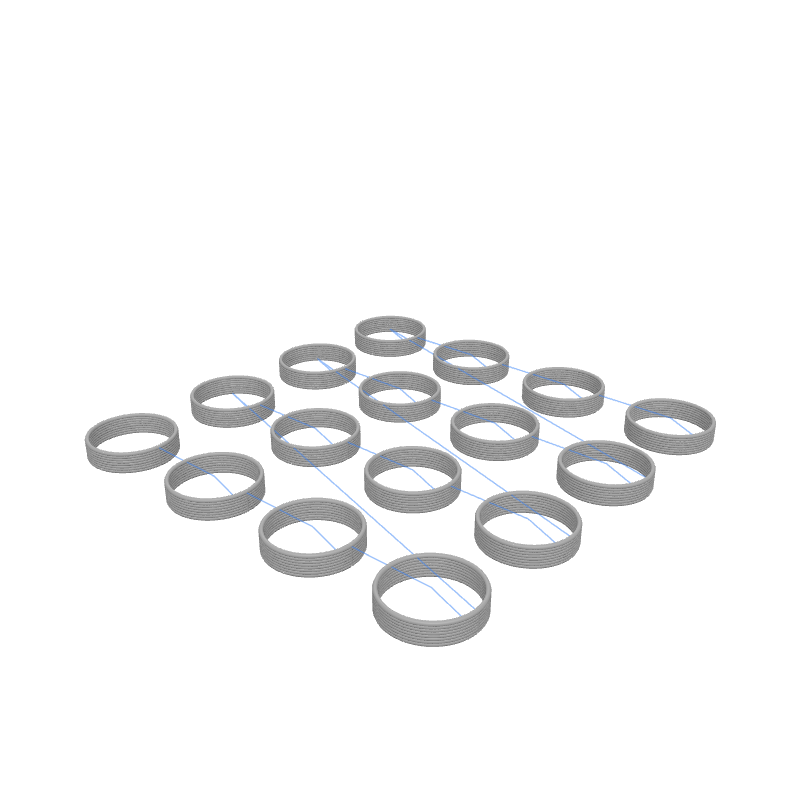
In this tutorial, you'll learn how to duplicate objects using the Grid Array block. This is perfect for batch printing multiple parts, creating grid-like textures, or producing test matrices.
What you'll learn
- How to use the Grid Array block to duplicate shapes across a grid
- How spacing and column/row counts control the pattern
- How to nest Stack Layers inside an array for sequential printing
- How to parameterise everything with Set Variable and viewport sliders
Prerequisites
- Completion of Tutorial 3 (Basic Cube) is recommended.
Step 1: Define your variables
We'll expose every grid and shape parameter as viewport sliders so you can reshape the pattern instantly.
Set Variable
Interactive preview is available in the interactive reader.
Step 1
Create five variables
Add five Set Variable blocks to the top of your Path Group:
- gridCols =
4
Enable Show in viewport on each one.
Step 2: Position the grid origin
The Grid Array expands to the right and back from its origin point. We'll start at X = 50, Y = 50 so the grid has room to grow without running off the build plate.
Translate
Interactive preview is available in the interactive reader.
Step 2
Add a Translate block
Drag a Translate block below the Set Variable blocks.
Set X to 50 and Y to 50.
All remaining blocks go inside the Translate body.
Step 3: Add Grid Array
The Grid Array block duplicates everything inside its body across a grid of columns and rows, automatically shifting the local origin for each copy.
Grid Array
Interactive preview is available in the interactive reader.
Step 3
Add Grid Array
From the Structure category, drag a Grid Array block into the Translate body.
Set Cols to the variable gridCols, Rows to the variable gridRows, Spacing X to the variable spacing, and Spacing Y to the variable spacing.
With 4 columns × 4 rows, that's 16 copies in total — each offset by 30 mm.
Step 4: Draw a cylinder
Inside the array, we define the shape to duplicate. A cylinder is just a circle repeated at stacked layer heights.
Stack Layers
Interactive preview is available in the interactive reader.
Step 4
Add Stack Layers
Drag a Stack Layers block into the Grid Array body.
Set Start Z to Layer Height (the printer-setting block), End Z to the variable cylinderHeight, and Layer Height to the Layer Height printer-setting block.
Circle
Interactive preview is available in the interactive reader.
Step 5
Add a Circle
From Geometry, drag a Circle block into the Stack Layers body.
Set Radius to the variable cylinderRadius.
Complete block program
Full program — Tutorial 11
Interactive preview is available in the interactive reader.
Final block structure
| # | Block | Where | Values |
|---|---|---|---|
| 1 | Set Variable gridCols | Path Group | 4 · Show in viewport |
| 2 | Set Variable gridRows | Path Group | 4 · Show in viewport |
| 3 | Set Variable spacing | Path Group | 30 · Show in viewport |
| 4 | Set Variable cylinderRadius | Path Group | 10 · Show in viewport |
| 5 | Set Variable cylinderHeight | Path Group | 5 · Show in viewport |
| 6 | Translate | Path Group | X = 50, Y = 50 |
| 7 | ↳ Grid Array | Inside Translate | Cols = gridCols, Rows = gridRows, Spacing = spacing |
| 8 | ↳ Stack Layers | Inside Grid | Start Z = Layer Height, End Z = cylinderHeight, LH = Layer Height |
| 9 | ↳ Circle | Inside Stack | R = cylinderRadius |
Outcome
You have created a fully parametric 4×4 grid of cylinders. The Grid Array block handles all the coordinate math, shifting the local origin for each copy. Drag the sliders to change the grid size, spacing, and cylinder dimensions in real time.
Load this tutorial
Interactive preview is available in the interactive reader.
Interactive preview is available in the interactive reader.
What's Next
Tutorial 12: Parametric Cup — Combine Stack Layers and Spiral Up to build a practical object with a solid base and hollow walls.