Tutorial 6: Sine Wave Vase
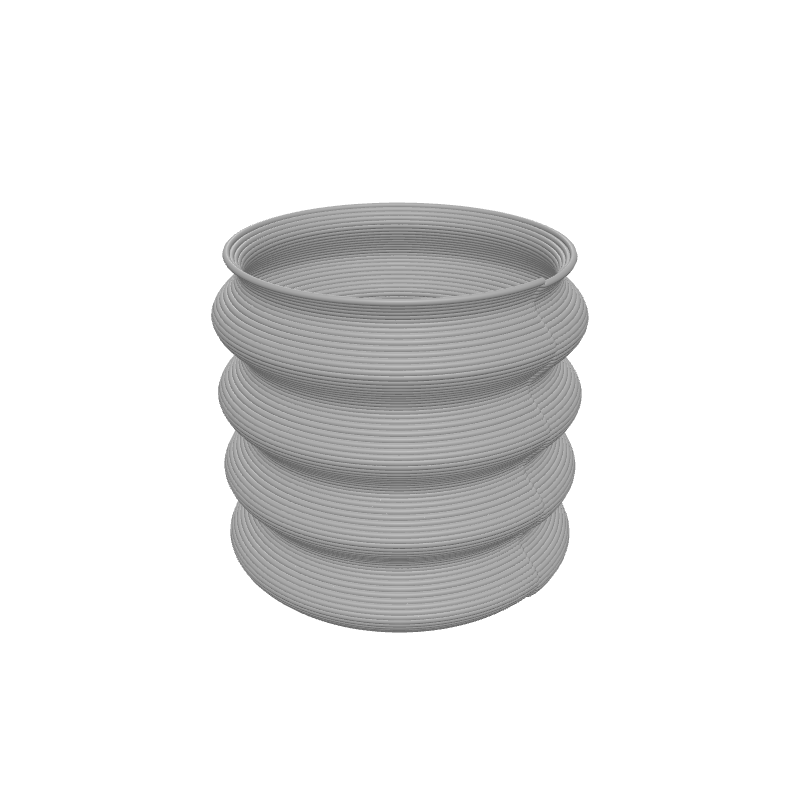
In this tutorial you'll use math to create organic shapes. By combining the Sin function with arithmetic blocks, you'll make the walls of a vase ripple in and out as they rise. Every parameter is exposed as a viewport slider so you can sculpt the waves interactively.
What you'll learn
- How to use the Arithmetic and Math (Sin) blocks to build expressions
- How to create wave patterns driven by height
- How to parameterise math-heavy designs with Set Variable and viewport sliders
Prerequisites
- Completion of Tutorial 2 (Spiral Vase) is recommended.
Step 1: Define your variables
We'll expose the wave parameters as viewport sliders so you can shape the ripples in real time.
Set Variable
Interactive preview is available in the interactive reader.
Step 1
Create four variables
Add four Set Variable blocks to the top of your Path Group:
- baseRadius =
25
Enable Show in viewport on each one.
Step 2: Centre on the build plate
Translate
Interactive preview is available in the interactive reader.
Step 2
Add a Translate block
Drag a Translate block below the Set Variable blocks.
Set X to Bed Size X / 2 and Y to Bed Size Y / 2.
All remaining blocks go inside the Translate body.
Step 3: Add the Spiral Up block
Spiral Up
Interactive preview is available in the interactive reader.
Step 3
Add Spiral Up
From the Z Strategy category, drag a Spiral Up block into the Translate body.
Set Start Z to Layer Height (the printer-setting block), End Z to the variable vaseHeight, and Rotations to vaseHeight / layer_height.
Using the Layer Height block instead of a magic number means the spiral resolution automatically matches your slicer settings.
Step 4: Build the Math expression
We want the radius to oscillate around a base value. The formula is:
Radius = baseRadius + amplitude × sin(normZ × frequency)
Where normZ goes from 0 at the bottom to 1 at the top. We build this from the inside out using nested blocks.
Math Blocks
Interactive preview is available in the interactive reader.
Interactive preview is available in the interactive reader.
Step 4
Build the radius expression
Start from the innermost operation and work outward:
- normZ × frequency: Add an Arithmetic (×) block. Set left to
Variable: normZ, right to the variablefrequency.
Step 5: Connect to Circle
Circle
Interactive preview is available in the interactive reader.
Step 5
Add a Circle
Drag a Circle block into the Spiral Up body.
Plug your complete math expression into the Radius input.
Complete block program
Full program — Tutorial 6
Interactive preview is available in the interactive reader.
Final block structure
| # | Block | Where | Values |
|---|---|---|---|
| 1 | Set Variable baseRadius | Path Group | 25 · Show in viewport |
| 2 | Set Variable amplitude | Path Group | 2 · Show in viewport |
| 3 | Set Variable frequency | Path Group | 25 · Show in viewport |
| 4 | Set Variable vaseHeight | Path Group | 50 · Show in viewport |
| 5 | Translate | Path Group | X = Bed Size X / 2, Y = Bed Size Y / 2 |
| 6 | ↳ Spiral Up | Inside Translate | Start Z = Layer Height, End Z = vaseHeight, Rot = vaseHeight / layer_height |
| 7 | ↳ Circle | Inside Spiral | CX = 0, CY = 0 |
| 8 | ↳ Arithmetic (+) | Radius | baseRadius + … |
| 9 | ↳ Arithmetic (×) | Right | amplitude × … |
| 10 | ↳ Sin | Right | |
| 11 | ↳ Arithmetic (×) | Input | normZ × frequency |
Outcome
You have created a fully parametric sine-wave vase! The walls ripple smoothly in and out, driven entirely by math blocks and live sliders.
Load this tutorial
Interactive preview is available in the interactive reader.
Interactive preview is available in the interactive reader.
What's Next
Tutorial 7: Bumpy Texture — Use a high-point Star shape to create surface texture with vertical ribs.