Tutorial 12: Parametric Cup
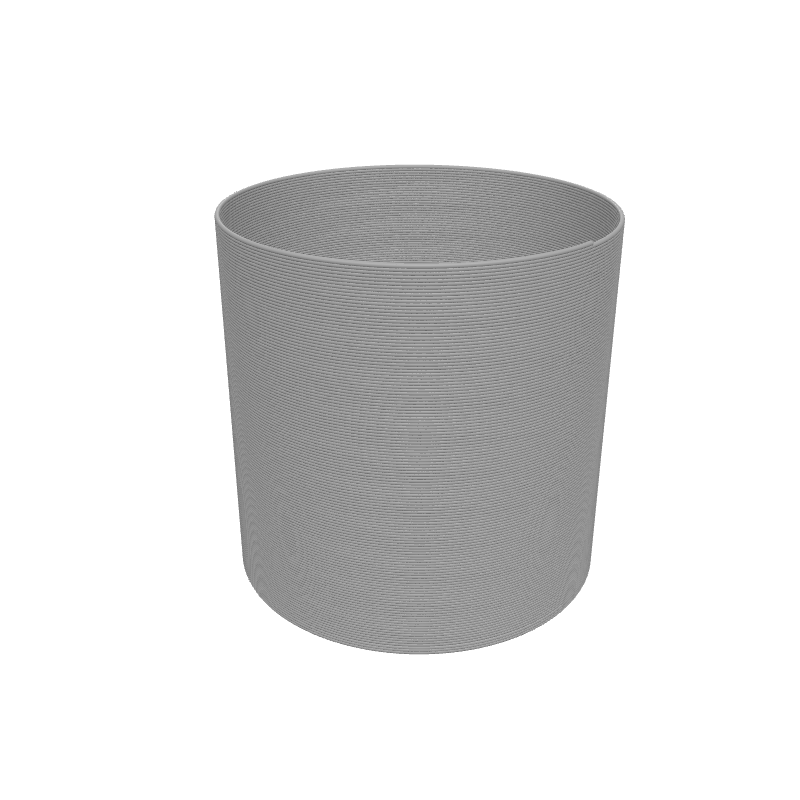
For our final beginner tutorial, let's build something practical: a cup. A cup has a solid bottom (Stack Layers) and hollow walls (Spiral Up). You'll combine both Z-strategies in a single program and parameterise everything so you can reshape the cup with a few slider drags.
What you'll learn
- How to combine Stack Layers (for the base) and Spiral Up (for the walls) in one design
- How to sequence two Z-strategy blocks one after the other
- How to parameterise a complete object with Set Variable and viewport sliders
Prerequisites
- Completion of several previous tutorials is recommended, especially Tutorial 3 (Stack Layers) and Tutorial 6 (Spiral Up basics).
Step 1: Define your variables
We'll make this design parametric from the start so every dimension is adjustable from the 3D viewport.
Set Variable
Interactive preview is available in the interactive reader.
Step 1
Create three variables
Add three Set Variable blocks to the top of your Path Group:
- cupHeight =
80
Enable Show in viewport on each one.
Step 2: Centre on the build plate
Translate
Interactive preview is available in the interactive reader.
Step 2
Add a Translate block
Drag a Translate block below the Set Variable blocks.
Set X to Bed Size X / 2 and Y to Bed Size Y / 2.
All remaining blocks go inside the Translate body.
Step 3: Print the solid base
The base needs to be a solid disc. We'll use Stack Layers for the first few millimeters, drawing the outer circle on each layer.
Stack Layers
Interactive preview is available in the interactive reader.
Step 3
Add Stack Layers for the base
From the Z Strategy category, drag a Stack Layers block into the Translate body.
Set Start Z to Layer Height (the printer-setting block), End Z to the variable baseThickness, and Layer Height to the Layer Height printer-setting block.
Circle
Interactive preview is available in the interactive reader.
Step 4
Draw the base circle
From Geometry, drag a Circle block into the Stack Layers body.
Set Radius to the variable cupRadius.
Step 4: Print the hollow walls
Now we switch to vase mode for the walls. The Spiral Up block creates a continuous helix from the top of the base to the full cup height.
Spiral Up
Interactive preview is available in the interactive reader.
Step 5
Add Spiral Up for the walls
Drag a Spiral Up block after (not inside) the Stack Layers block, but still inside the Translate body.
Set Start Z to the variable baseThickness, End Z to the variable cupHeight, and Rotations to (cupHeight − baseThickness) / layer_height.
The rotation count formula ensures one full revolution per layer: the wall height divided by the layer height gives the exact number of rotations needed.
Step 6
Draw the wall circle
From Geometry, drag a Circle block into the Spiral Up body.
Set Radius to the variable cupRadius.
Complete block program
Full program — Tutorial 12
Interactive preview is available in the interactive reader.
Final block structure
| # | Block | Where | Values |
|---|---|---|---|
| 1 | Set Variable cupHeight | Path Group | 80 · Show in viewport |
| 2 | Set Variable cupRadius | Path Group | 40 · Show in viewport |
| 3 | Set Variable baseThickness | Path Group | 2 · Show in viewport |
| 4 | Translate | Path Group | X = Bed Size X / 2, Y = Bed Size Y / 2 |
| 5 | ↳ Stack Layers | Inside Translate | Start Z = Layer Height, End Z = baseThickness, LH = Layer Height |
| 6 | ↳ Circle | Inside Stack | R = cupRadius |
| 7 | ↳ Spiral Up | Inside Translate | Start Z = baseThickness, End Z = cupHeight, Rot = (cupHeight − baseThickness) / layer_height |
| 8 | ↳ Circle | Inside Spiral | R = cupRadius |
Outcome
You have built a fully parametric cup! Change the variables in the 3D viewport to instantly resize your cup — make it a tall tumbler, a wide bowl, or a thick-bottomed espresso cup without changing a single block.
Load this tutorial
Interactive preview is available in the interactive reader.
Interactive preview is available in the interactive reader.
What's Next
Congratulations! You've completed the Beginner SynthBlocks Course. You now know how to:
- Position and move the printer with Travel and Translate blocks
- Create loops with Repeat, Stack Layers, Spiral Up, and For Z
- Parameterise designs with Set Variable and viewport sliders
- Use math with Map Range and Arithmetic
- Control hardware settings with Set Temperature and Set Speed
- Duplicate shapes with Grid Array
- Use the Layer Height printer-setting block to avoid magic numbers
Check out the Advanced section for more complex projects, or explore the Block Reference in the Documentation for details on every block.