Tutorial 1: Circular Shape with Repeating Layers
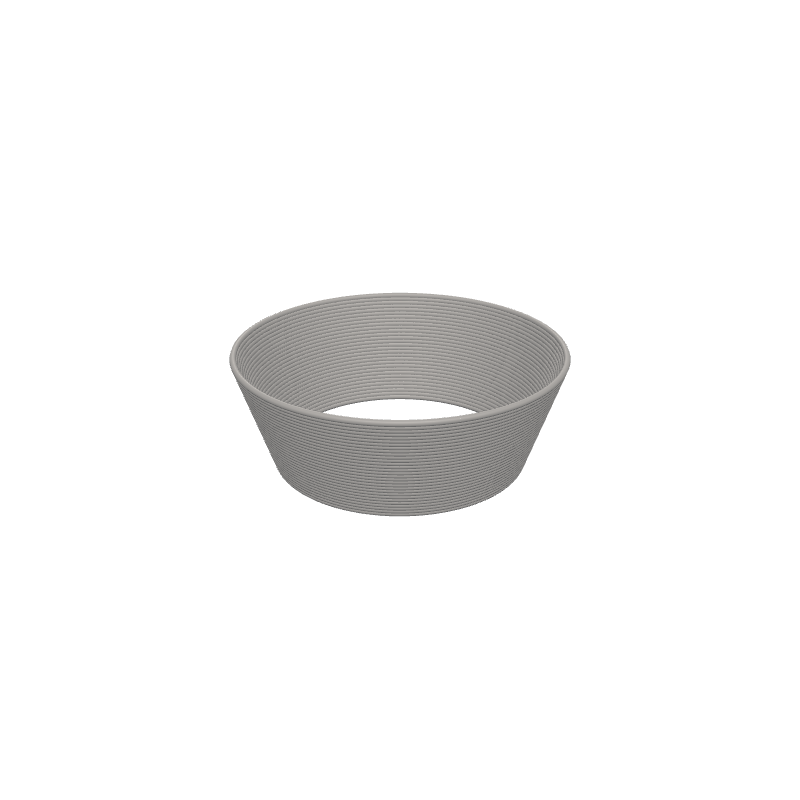
In this first SynthBlocks tutorial you'll create a tapered column — a stack of 30 circles that grow slightly in radius with each layer. Along the way you'll learn the core building blocks: positioning, variables, loops, geometry, and math.
What you'll learn
- How to position the toolhead with Travel blocks
- How to store and update values with Variables
- How to repeat operations with the Repeat loop
- How to draw geometry with the Circle block
- How to do math with the Arithmetic block
Prerequisites
- Open 3dSynth and click SynthBlocks on the start screen
- You should see the block canvas with a Toolpath block containing an empty Path Group
Step 1: Position the nozzle with Travel (Absolute)
Before drawing anything, we need to move the nozzle to the center of the build plate. The Travel (Absolute) block moves the toolhead to exact X, Y, Z coordinates without extruding.
Travel (Absolute) X, Y, Z
Interactive preview is available in the interactive reader.
Step 1
Add a Travel (Absolute) block
Open the Travel category in the toolbox sidebar. Drag a Travel (Absolute) X, Y, Z block into the Path Group. Set the values to: X = 125, Y = 105, Z = 0.
These coordinates center the shape on a 250×210 mm build plate. The nozzle starts at the bed surface (Z = 0).
Step 2: Create a variable for the radius
We want each layer's circle to be slightly larger than the previous one. To do this, we'll store the radius in a variable called radius and increase it after every layer.
The Set Variable block stores a number under a name. The Get Variable block reads it back later.
Set Variable
Interactive preview is available in the interactive reader.
Step 2
Create the radius variable
Open the Variables category and click Create Variable. Name it radius. A Set Variable block appears on the canvas — drag it into the Path Group, below the Travel block. Set the value to 20. Check Show in viewport so you can see a live slider in the 3D viewer.
This sets the starting radius to 20 mm. Later, inside the loop, we'll read this value and increase it.
Step 3: Add a Repeat loop
The Repeat block runs everything inside its body a fixed number of times. We'll use it to draw 30 layers.
Repeat
Interactive preview is available in the interactive reader.
Step 3
Add a Repeat block
Open the Structure category and drag a Repeat block below the Set Variable block (still inside the Path Group). Change the count to 30. This will execute the loop body 30 times — once per layer.
Everything we add inside this Repeat block from now on will happen 30 times.
Step 4: Draw a circle
The Circle block draws a circular path at the current Z height. Its radius input determines how large the circle is.
Circle
Interactive preview is available in the interactive reader.
Step 4
Add a Circle inside the Repeat body
Open the Geometry category and drag a Circle block into the Repeat block's body. Leave CX and CY at 0 (the circle is centered on the current position). For the radius input, we need the current value of our variable — open the Variables category, find the Get Variable block for radius under "Your variables", and drag it into the radius slot (replacing the default number).
Get Variable
Interactive preview is available in the interactive reader.
Now the circle reads its radius from the radius variable. On the first iteration it will be 20 mm; as we update the variable each loop, the radius will grow.
Step 5: Move up one layer height
After drawing each circle, the nozzle needs to move up before the next one. The Travel (Relative) Z block moves the nozzle by an offset from its current position — perfect for stepping up layer by layer.
Travel (Relative) Z
Interactive preview is available in the interactive reader.
Step 5
Add a Travel (Relative) Z block
Open Travel and drag a Travel (Relative) Z block below the Circle (still inside the Repeat body). Set Z to 0.6. This moves the nozzle up by 0.6 mm — one layer height — after each circle is drawn.
Step 6: Increase the radius for the next layer
Finally, we update the radius variable so the next circle is a little larger. We use Arithmetic to add 0.2 to the current value.
Arithmetic
Interactive preview is available in the interactive reader.
Step 6
Update the variable with Arithmetic
From Variables, drag another Set Variable block for radius below the Travel (Relative) Z block (still inside Repeat). Now open Math and drag an Arithmetic block into the value slot. Set it up as: left = Get Variable radius, operator = +, right = 0.2.
This expression computes radius + 0.2 each iteration. After 30 loops, the radius grows from 20 → 20.2 → 20.4 → … → 25.8 mm, creating the tapered shape.
Complete block program
Here is the full block program as it should look on your canvas:
Full program — Tutorial 1
Interactive preview is available in the interactive reader.
Final block structure
| # | Block | Where | Values |
|---|---|---|---|
| 1 | Travel (Absolute) X, Y, Z | Path Group | X=125, Y=105, Z=0 |
| 2 | Set Variable radius | Path Group | 20 |
| 3 | Repeat | Path Group | 30 times |
| 4 | ↳ Circle | Inside Repeat | CX=0, CY=0, radius=Get radius |
| 5 | ↳ Travel (Relative) Z | Inside Repeat | Z=0.6 |
| 6 | ↳ Set Variable radius | Inside Repeat | radius + 0.2 |
Outcome
You should now see a tapered column in the 3D viewport: 30 stacked circles growing from 20 mm to 25.8 mm radius, over 18 mm of total height (30 × 0.6 mm).
Load this tutorial
Want to skip the building steps and jump straight to the result? Click the button below to load the completed Tutorial 1 project into 3dSynth.
Interactive preview is available in the interactive reader.
Interactive preview is available in the interactive reader.
What's Next
Tutorial 2: Spiral Vase with Dynamic Radius — Build a seamless tapered vase with Spiral Up, Variable (normZ), and Map Range in about 10 minutes.
Head back to the SynthBlocks Overview to see all available tutorials, or explore the Block Reference in the Documentation for details on every block.